
Tags
The first week of January my husband and I were looking at each other, sitting on the couch, and all of a sudden he said, “let’s tear down the living room wall.” So, we did. Right then and there.

Why not just remove a wall today? No big deal.
We moved all of the furniture to another room and tore down the drywall and cut it into tiny pieces to throw them away. You see, we had heard there was brick behind the drywall. We cut out a few exploratory pieces of the wall first to see the condition of the brick. It looked really nice. Then, we scored all of the edges and knocked that baby down.

Spoiler alert: the brick was not actually in great condition, AND we found black mold. All exciting things… As we were tearing down the wall, we noticed that some of the brick was covered in white salt. That’s a sign of efflorescence, or water moving through the brick, dissolving the internal salt, and carrying it to the surface before evaporating. In other words, there was some moisture in the wall that needed out. Next to that area, we noticed there was insulation… the only insulation on the entire wall. I’m sure you can guess what fun surprise was hiding behind the insulation… that’s right, water and black mold. Apparently, insulation can be both good and bad. In the case of moisture, insulation can hold it in place… which is bad.

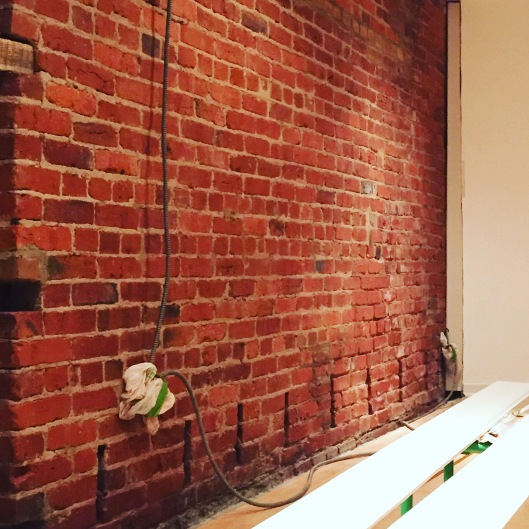
As you can see, our brick was NOT in great condition. There were several cuts throughout it for piping many years ago. Then again, it WAS built in 1903. On the bright side, we found a doorway between our unit and our neighbors (EXCITING!). After talking with our HOA, we discovered that our building was an apartment building for wealthy men at the turn of the century. Our two condo units were probably one large apartment. We also learned that there had been a flood in our unit ten years earlier caused by the unit above us. Everything else was able to dry out, but this small area with insulation was holding water. Yikes. Glad we got it out of there!

LOTS of damage, plaster, dirt, salt, mold, etc.
As for the state of the brick, we realized this “fast, inexpensive DIY project” had quickly become a money pit. Doesn’t it usually work out that way? You see, we needed to hire a mason to repair the wall. After extensive googling (which yielded only DC Freemason results), we finally found our guy from Craigslist. We had several masons come and look at our wall, and we shockingly ended up choosing the highest bidder. He was a former mason, current engineer, that was able to provide a lot of knowledge on historic masonry. We were able to negotiate a better price by agreeing to be his labor for the day, so he didn’t need to hire out additional help. Basically, we got a discount AND free masonry training. Killer deal!

My husband, the mason apprentice
We had to mix a special mortar for our brick due to its age. Mortar needs to be softer than the brick and should very slowly flex with settling of the brick. Our mason decided to go with Type N Cement Mortar mixed with sand, since Type N Mortar has the lowest compression strength compared to Type S and Type M Cement Mortars. I was going to have a special mortar made and color matched to my wall, but Storm Jonas arrived in DC. I wasn’t able to drive to the specialty brickyard for the color matching, so we had to attempt to color match it ourselves. It seemed like a good color match on the small areas, but it didn’t end up matching well on the larger spots. I’m working up an innovative solution though!


I’m so glad we hired out the masonry! There is so much to know, and I know we couldn’t have tackled that ourselves! Our mason had to use a small jackhammer to chip out large sections. He told us that he was using around $10,000 in tools for the job, so I know we saved A LOT of money by hiring it out. He also helped us source historic kiln-fired brick that was produced the same decade as ours, and it was a very close match. As for our apprenticeship, we learned some fun techniques to texturize the mortar to make it seem older and blend it in properly. We also learned to mix our own mortar, cut bricks, remove masonry nails, and repoint a brick wall! Here’s a small picture of it after being patched.
Our “in progress” brick wall with all of the patches finished
I’ll be making a few more posts on this massive project, including how to clean brick (it’s not as easy as my internet research led me to believe) and what we decided to do with the doorway between units. It’s still a work in progress, so I’m especially excited to reveal the final product… but I have no idea what that will look like!

Pingback: How to clean brick (quickly, cheaply, effectively) | district of decor
Pingback: Living with Exposed Brick (Things to Consider Before Exposing Your Brick) | district of decor
Love your story. Beautiful job on the brick. My husband and I lived a similar story about 30 years ago or so. We bought a former one room schoolhouse that had been converted into a 4 room house. We took down walls, and exposed brick inside and out. The brick looks strikingly similar to yours. W never coated the interior brick but it still looks good and has held up fine…the exterior was all repainted of course. My husband was a brick mason in his younger days and together we did the repointing. Thanks for sharing your story. I enjoyed reading it and reliving all that hard work and brick dust!
LikeLike